
Have you ever experienced issues with your Xhorse software? Then this step-by-step guide will walk you through eliminating antivirus issues for Xhorse VVDI2, VVDI Mercedes Benz or VVDI BMW Software. Some antivirus software categorises Xhorse as malware and can prevent you from downloading, installing and can even corrupt the software after you have installed it. To prevent this, follow these steps to make sure that Xhorse works for you without interference from your antivirus software.
There are two ways to install Xhorse software. Extracting the file from a zip/rar file or using an Installer. Both of these require the following steps before you download, install and use any Xhorse software.
STEP 1: TURN OFF ANTIVIRUS AND WINDOWS SECURITY/DEFENDER
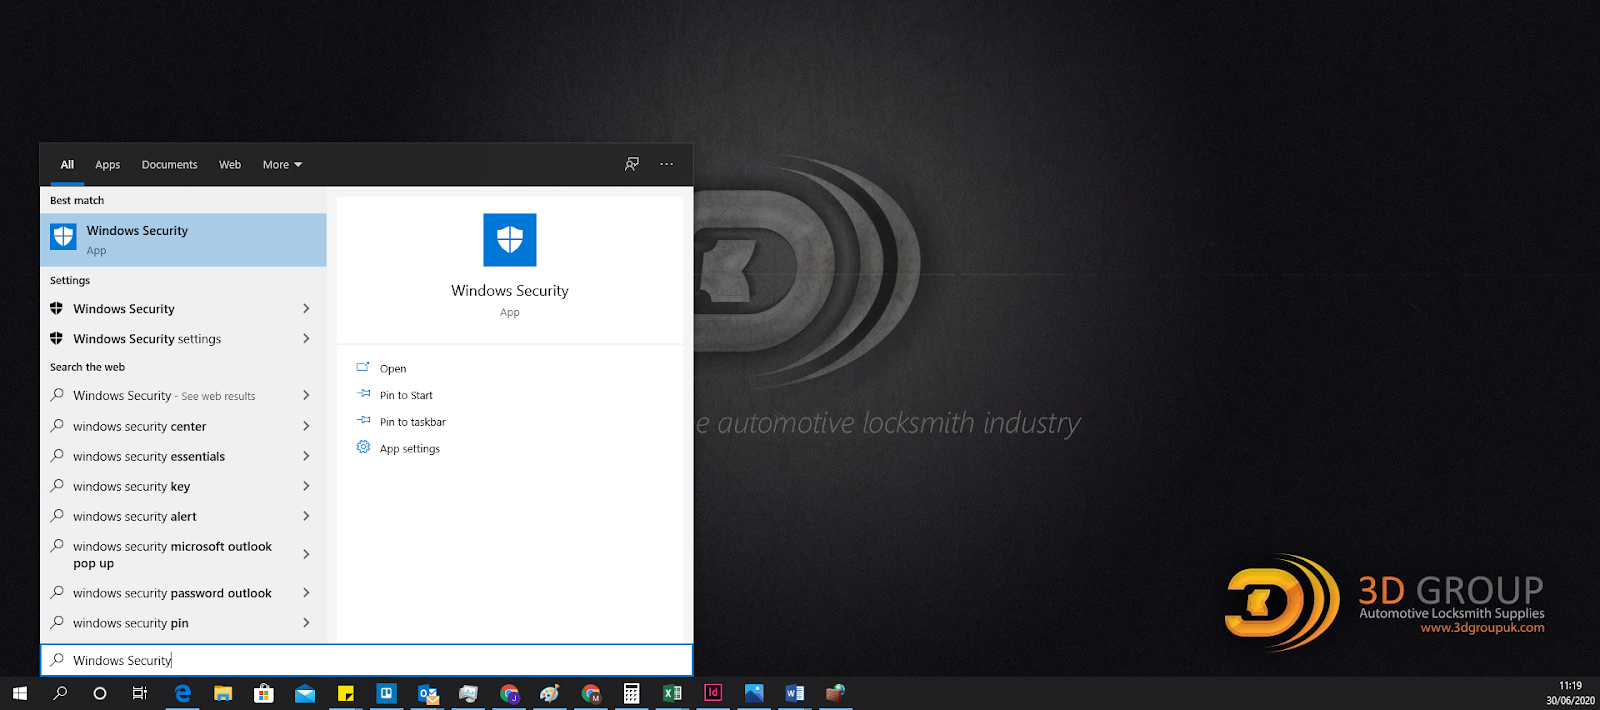
To start simply go to the Windows icon in the bottom left-hand corner of the screen and type ‘Windows Security’ and click the blue icon with a white shield that pops up under 'Best match'. This opens the 'Windows Security' panel
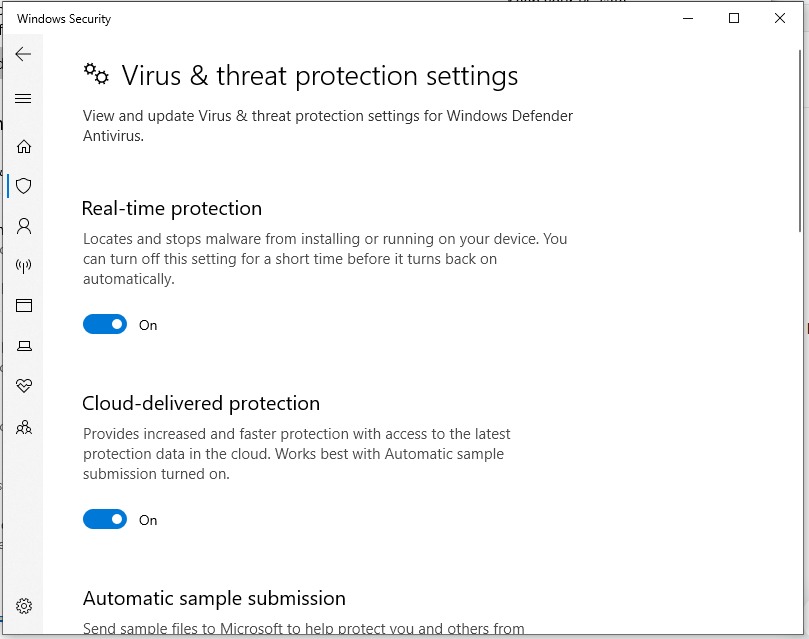
Next, go to 'Virus & threat protection' and click the shield icon with a small warning symbol in the bottom right corner. This opens another window. The first option you will see is to turn off 'Real-time protection'; this slider will be set to 'On' by default. Turn this to 'Off'.
If you have any other antivirus software, you will also need to disable them during download. Each antivirus software will have its own how-to guide on how to deactivate them when downloading from a trusted source. Here is a list of the most common.
STEP 2: DOWNLOAD YOUR XHORSE SOFTWARE FROM YOUR PREFERRED XHORSE SOFTWARE WEBSITE.
Open your web browser and Download your Xhorse software from your preferred source. Follow the installation guidelines provided with your download and make a note of where your Xhorse files have been stored on your device. If the files came as Zip or Rar download, then keep note of where you extracted the files, as you’ll need this in Step 3. If you used an installer, as is common with VVDI2, then you will need to keep a note of where the installer has placed the software files. Such as C Drive > Program Files > Xhorse.
STEP 3: ADD FOLDER TO WINDOWS SECURITY EXCLUSION LIST
You will need to exclude the installed Xhorse files, as once your antivirus software is reactivated, it will scan your computer regularly for viruses. The antivirus software will often identify your Xhorse files as a virus, so to avoid the software being corrupted, you need to add them to your antivirus exclusion list.
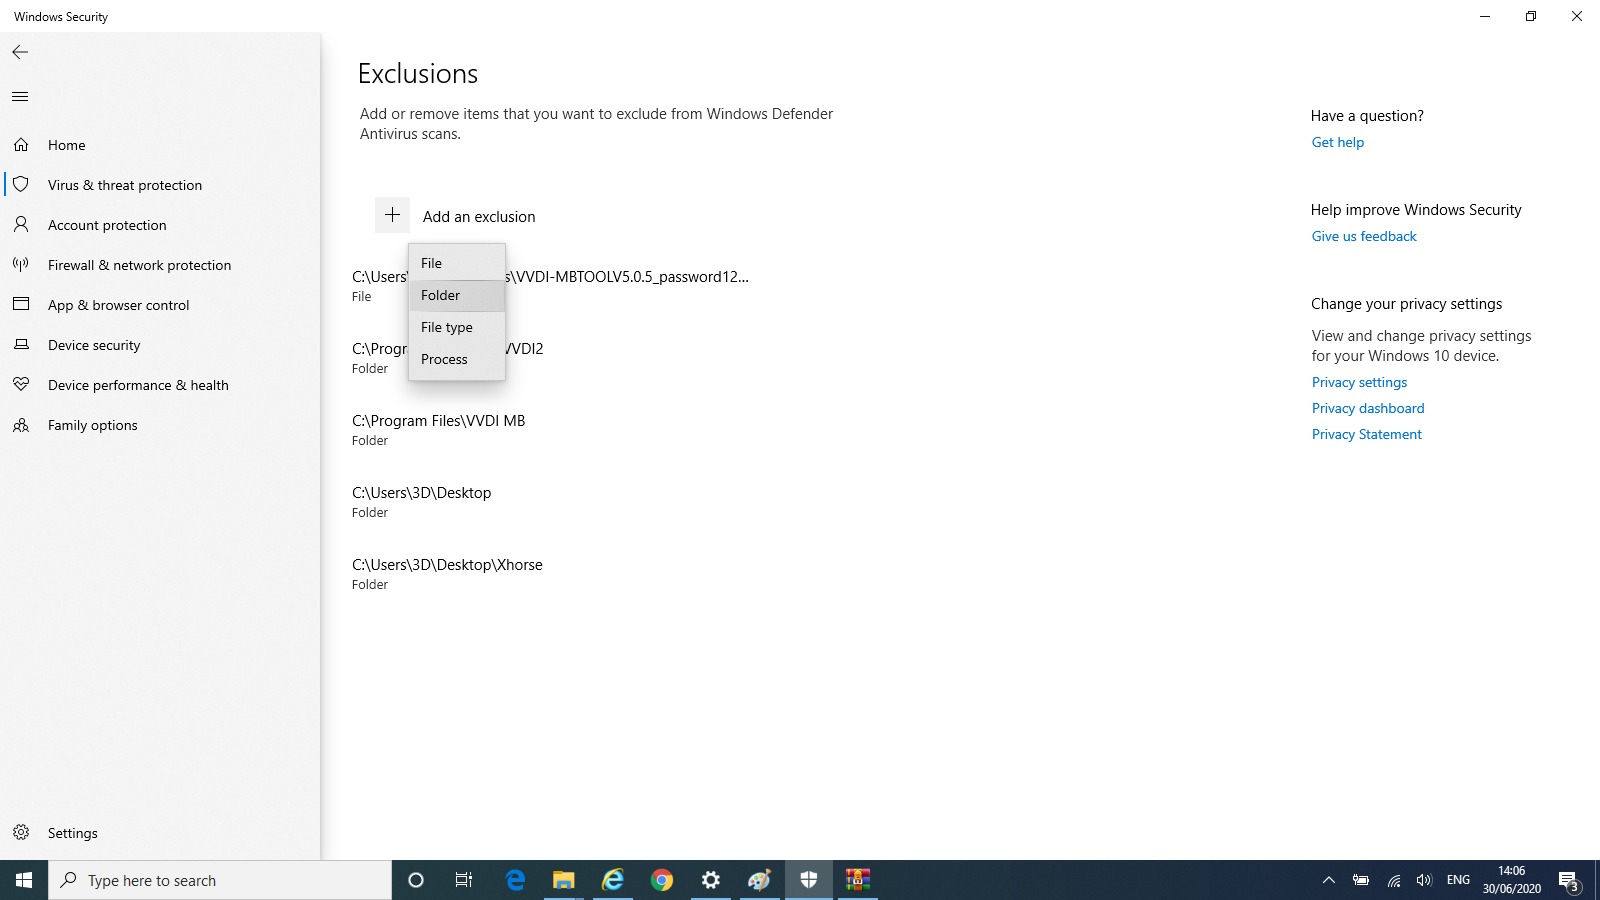
Go back to the 'Windows Security' panel, then 'Virus & threat protections'. Scroll down to Exclusions and click 'Add or remove exclusions'. This will take you to a new menu called 'Exclusions' with a button shaped like a plus sign which says 'Add an exclusion'. Click this and select 'Folder' from the dropdown menu, then simply navigate to your extracted or installed Xhorse software’ folder and click ‘select folder’. This is not the folder where you downloaded the file but the folder where the file will run from on your device.
Once again, if you have another antivirus software, you will need to add the folder containing your Xhorse software to its exclusion list.
STEP 4: REACTIVATE 'REAL-TIME PROTECTION'
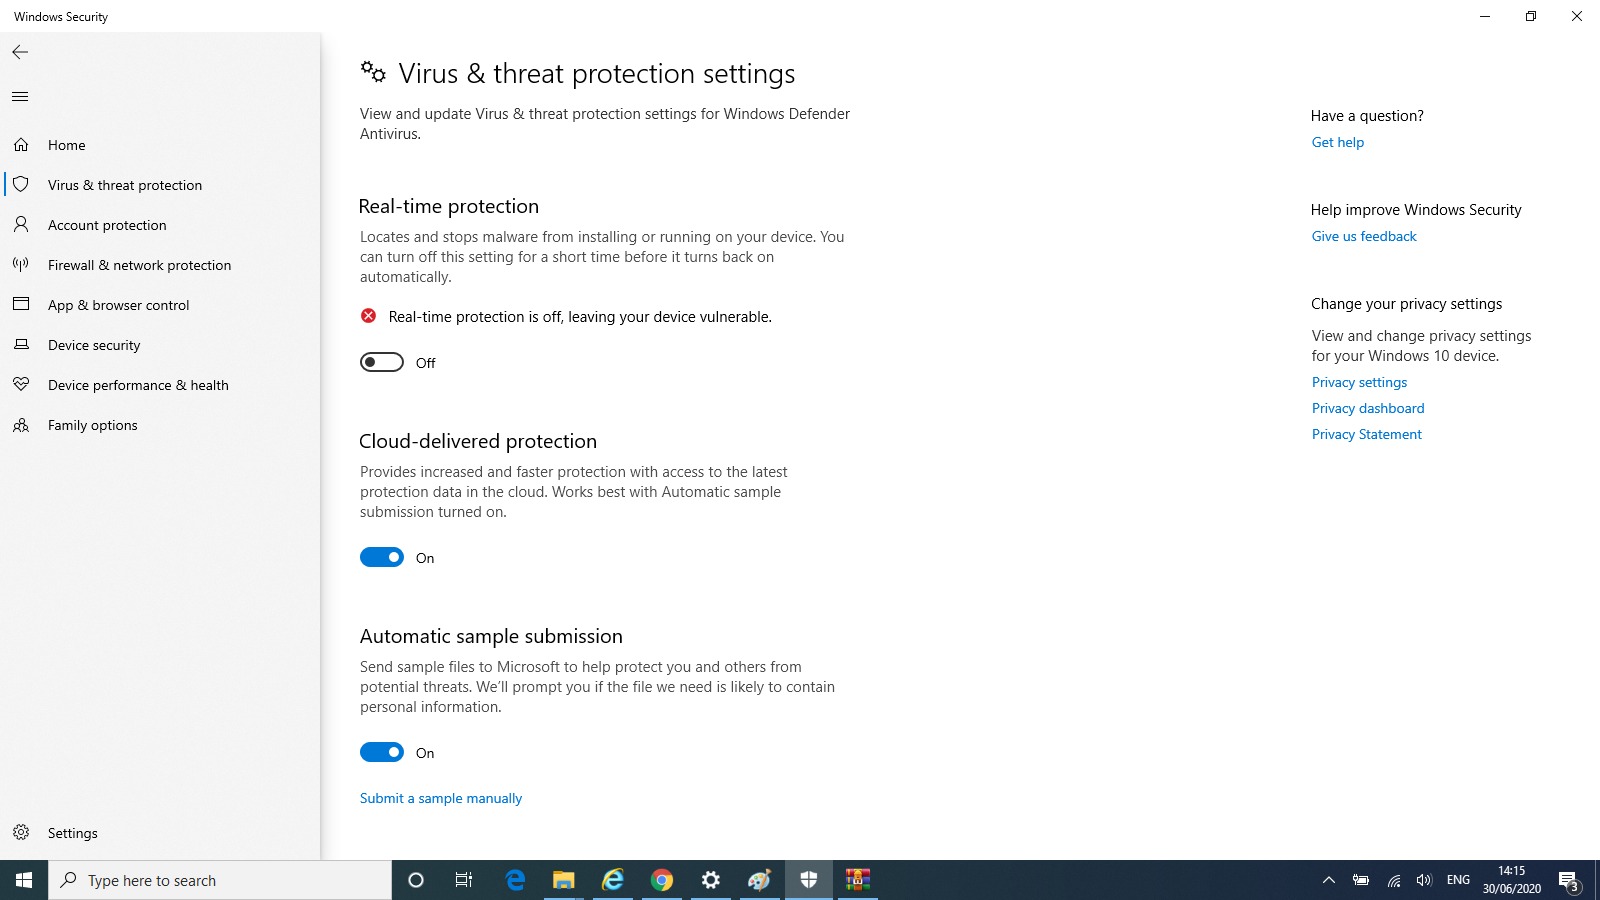
Now navigate back to Virus & threat protection and switch 'Real-time protection' back on to prevent any threats from Malware. Your Xhorse software will now be ready to use and protected from your antivirus software.